After exporting table data to Excel files in SQL Developer, we can do some import test. In this post, I'll show you how to import data from an Excel file.
To import excel to the database, we have 2 options:
Import Excel to be a New Table
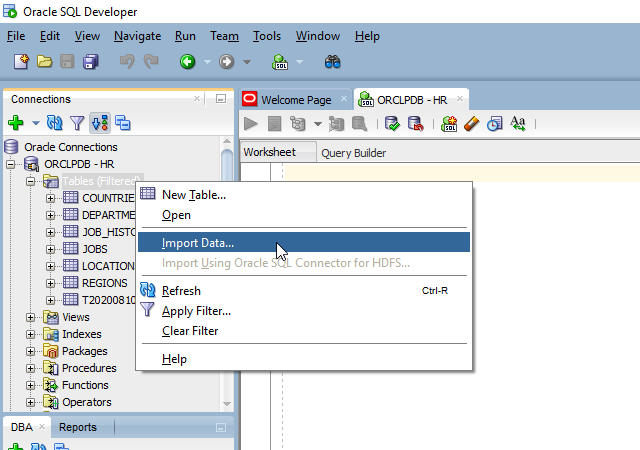
Table Import Menu
We right-click on "Tables" category, and select Import Data.
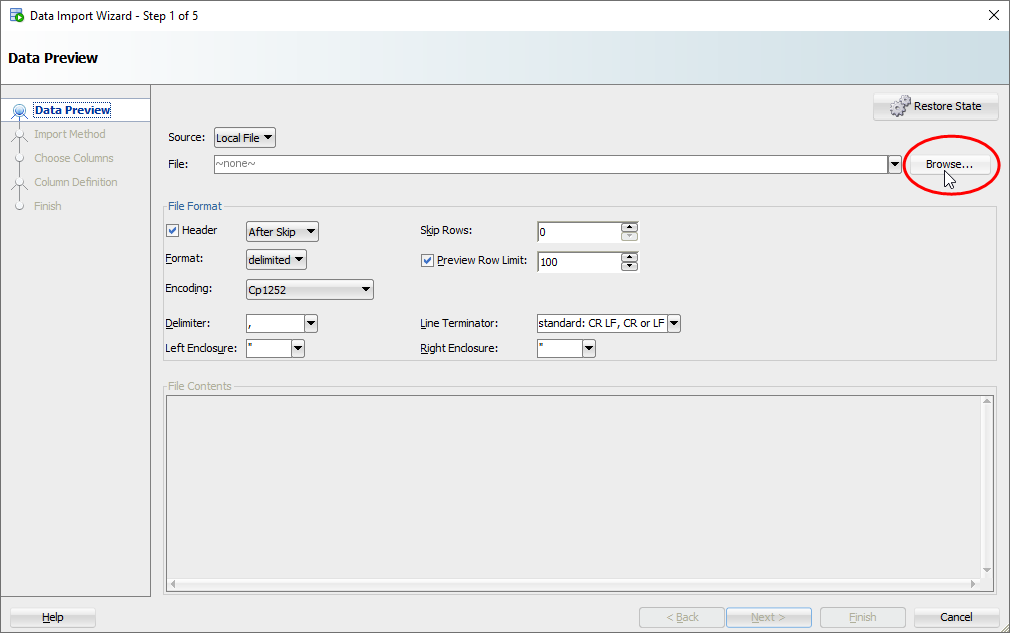
Select Excel File
Click on Browse to select the right Excel file to import.
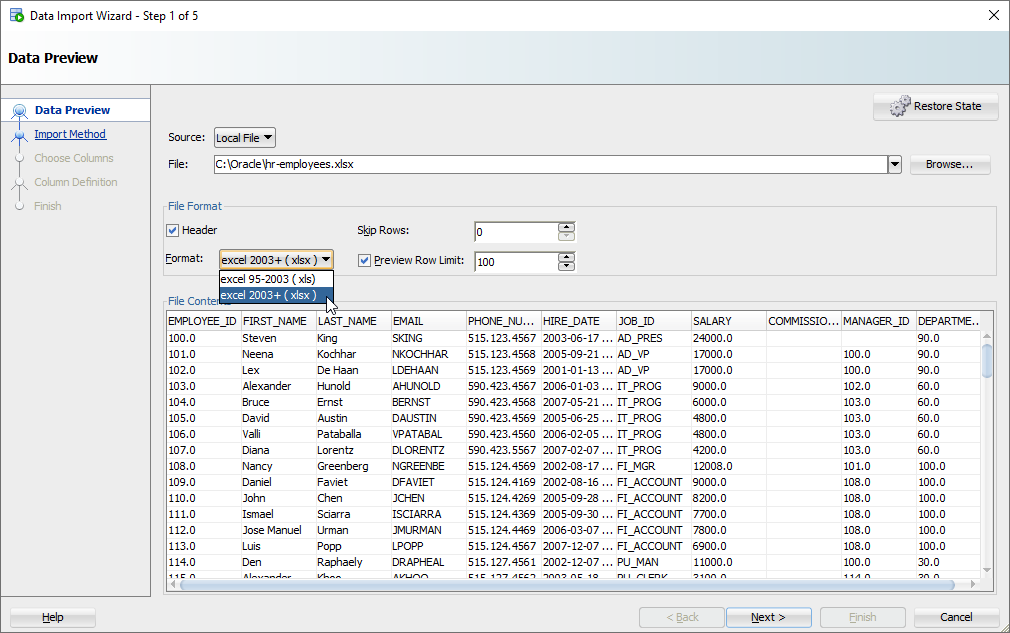
Select Excel Format
We choose "excel 2003+ (xlxs)" as our import format.
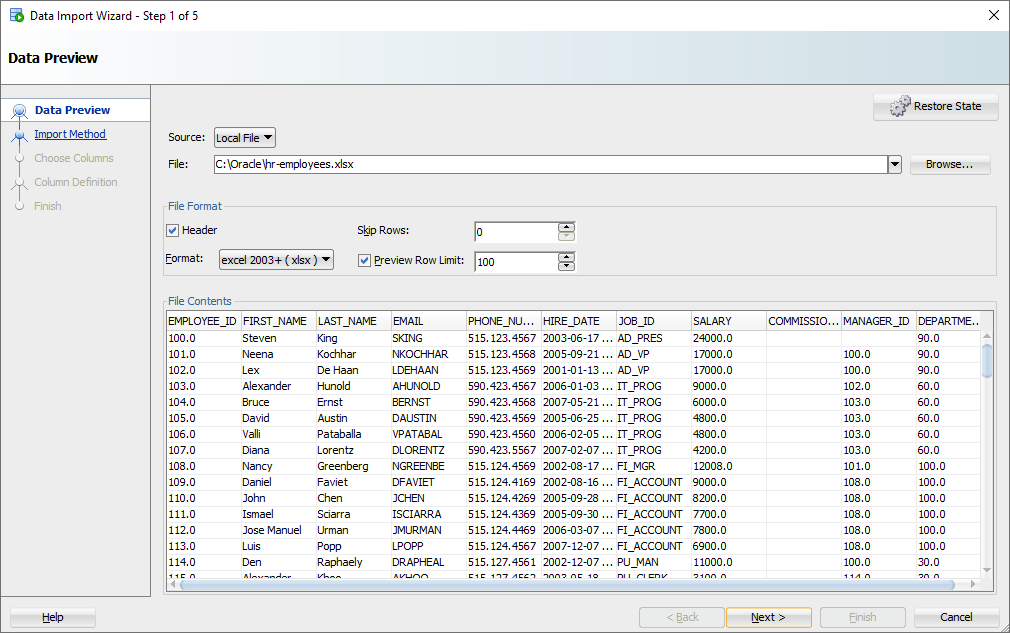
We preview the data and then click "Next" to proceed.
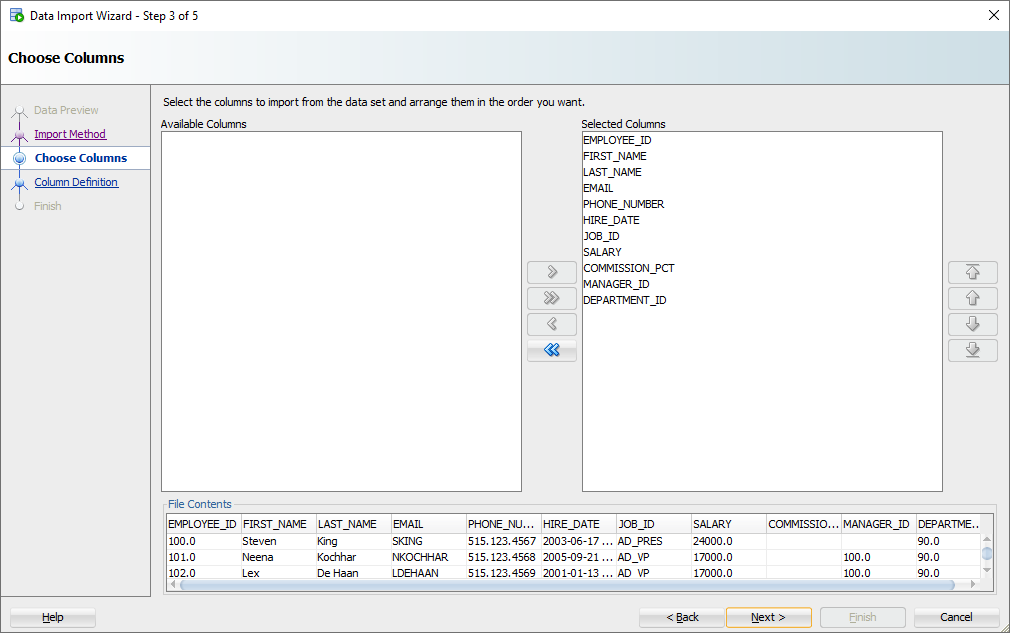
Choose Columns
We can import the entire or a part of the data by choosing columns. The column order can also be changed here.
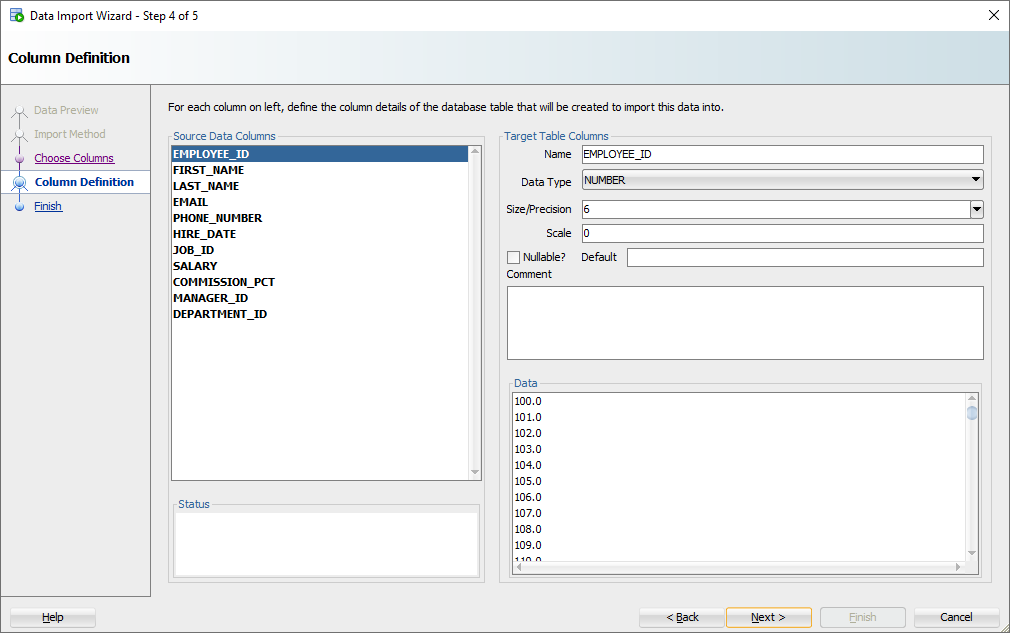
Adjust Column Definition
We can adjust columns' definition here.
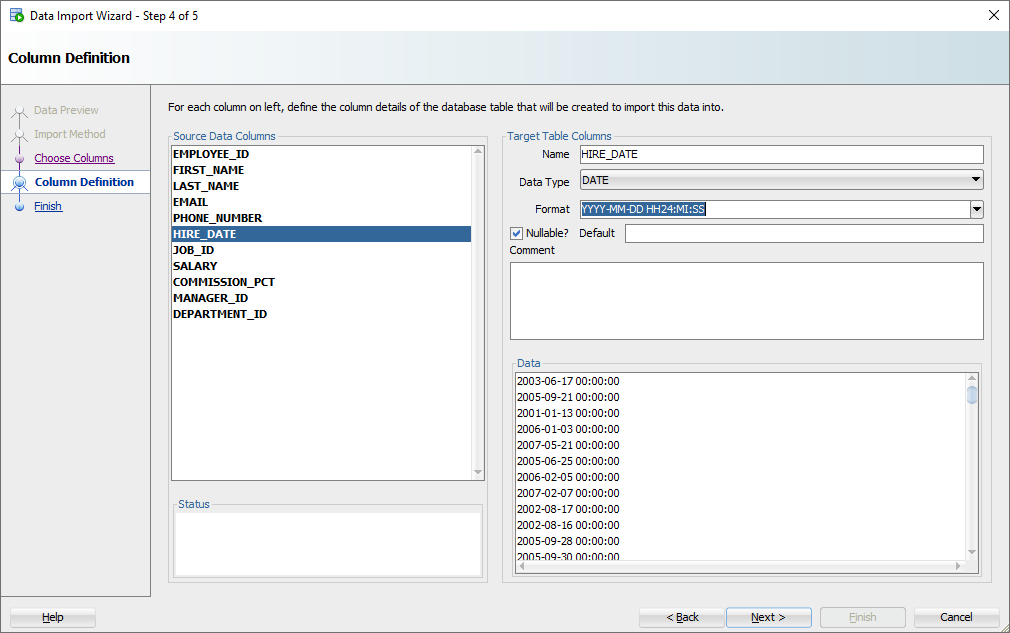
The datetime format of being import data should be especially taken care of.
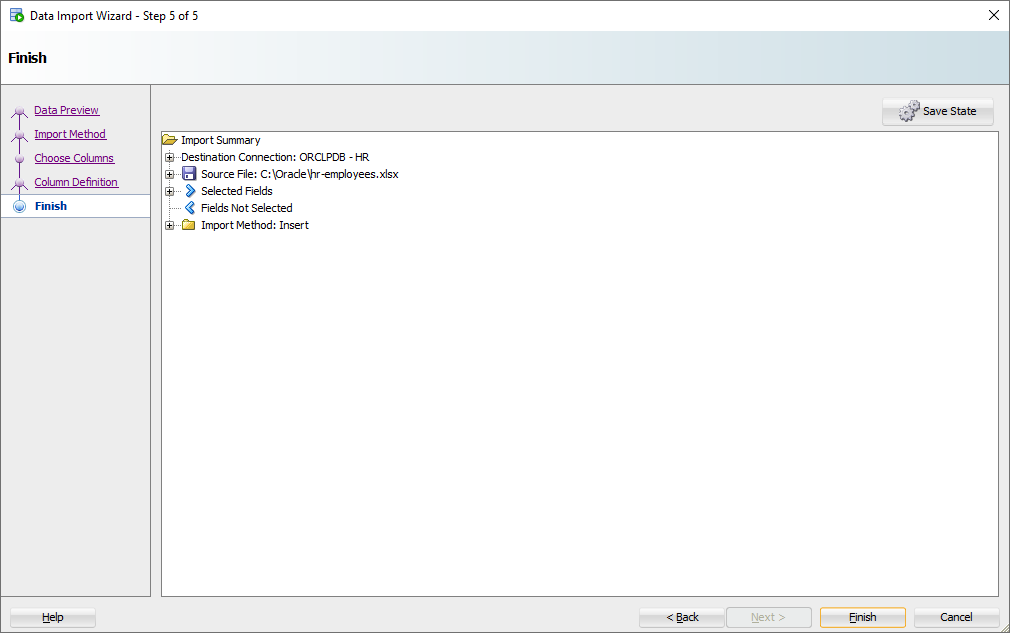
Preview Import Task Summary
We confirm the import task by previewing its summary.
Perform Import Task
If everything is ready, please click "Finish". The feedback is as below.

Import Excel to an Existing Table
Table Import Menu
We right-click on the table name, and select Import Data.
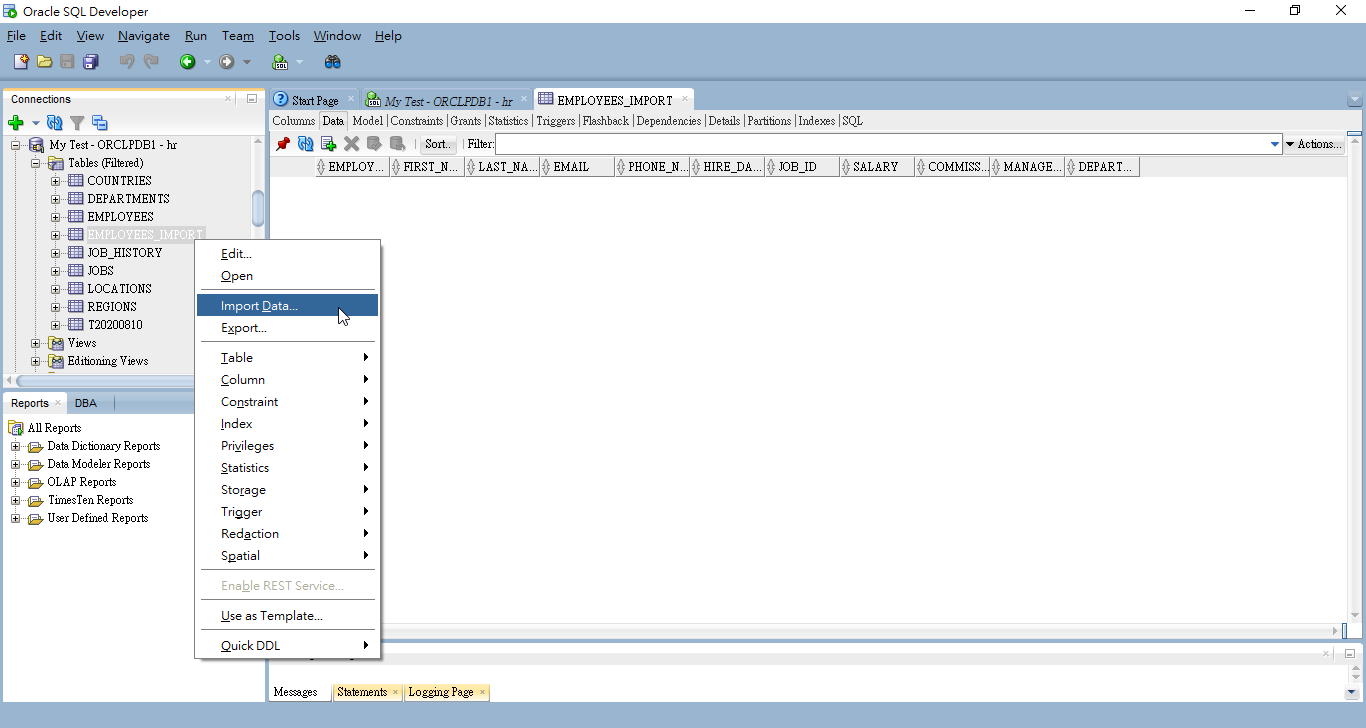
Select Excel File
Click on Browse to select the right Excel file to import.
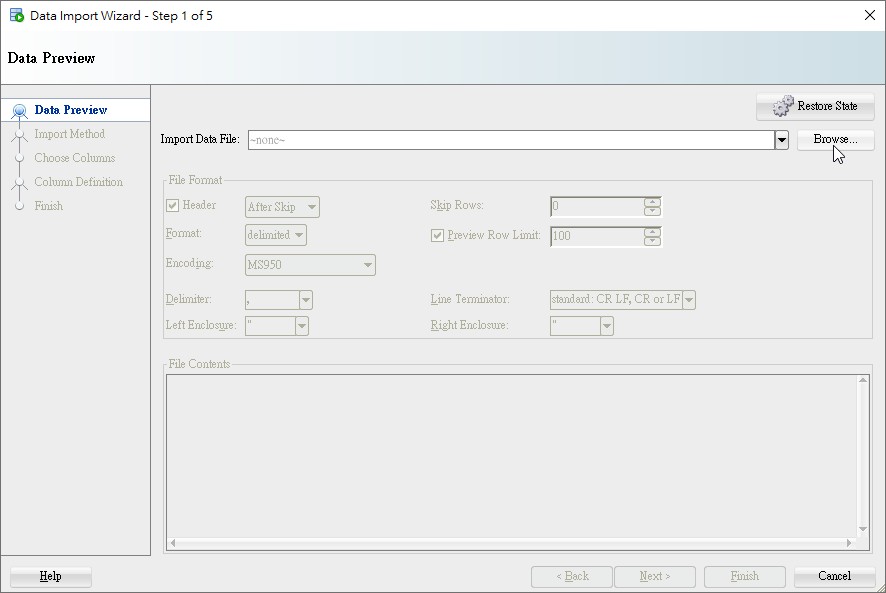
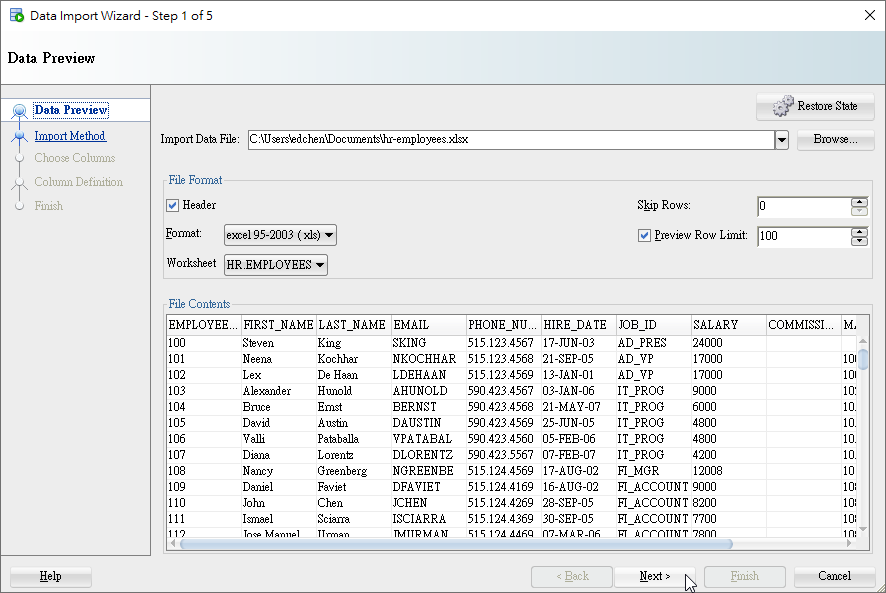
Preview Excel File
We can preview the content data in the file. If you don't have the header row, please uncheck Header choice.
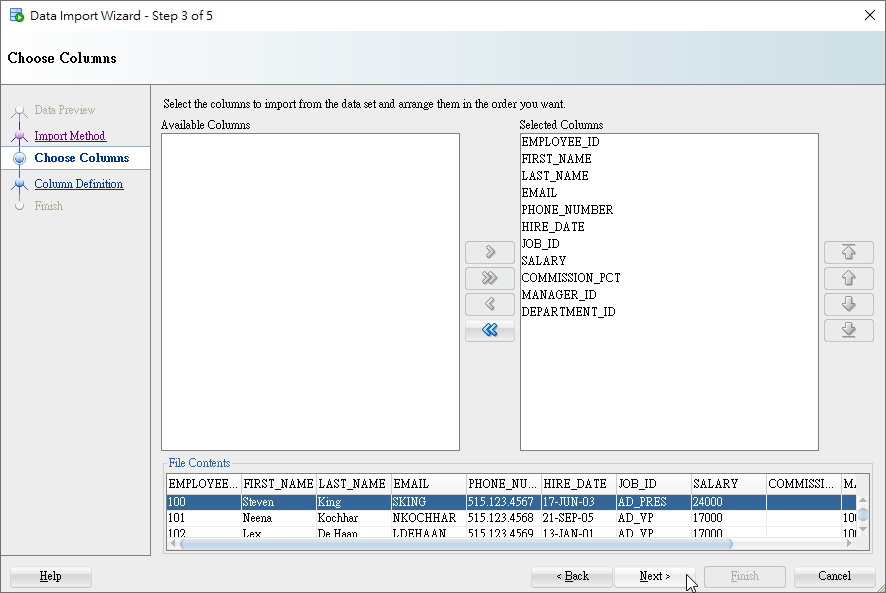
Select Columns
Columns can be selectively imported. Here we select all columns.
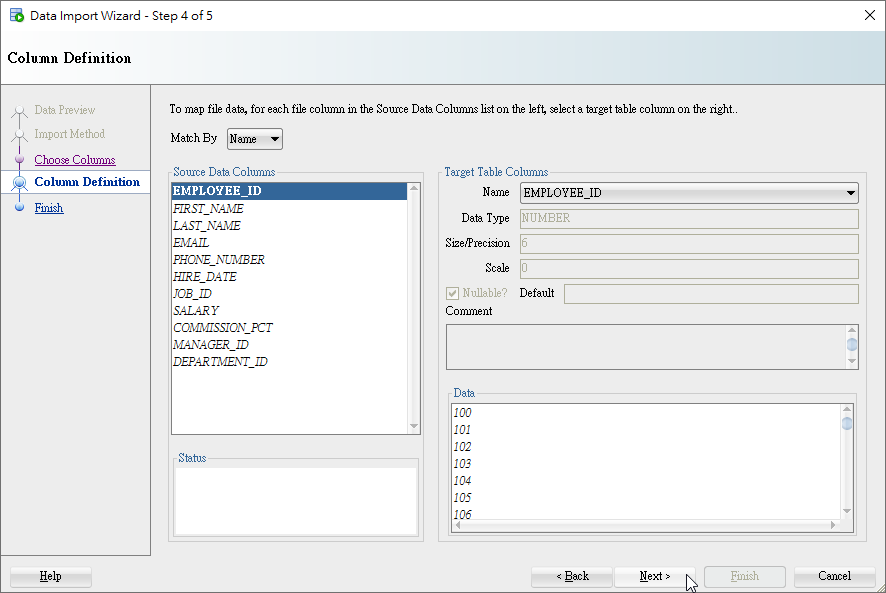
Map Columns
We can map columns by Name or Position as shown in the following image.
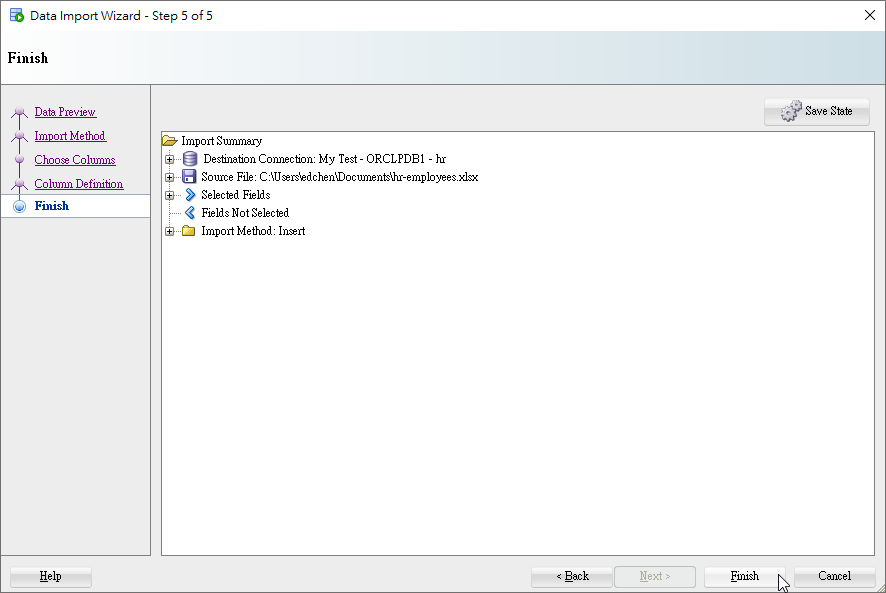
Import Data Summary
In the summary, we can go back anytime by clicking the item which needs to be modified. If there's nothing wrong, we can import the data now.
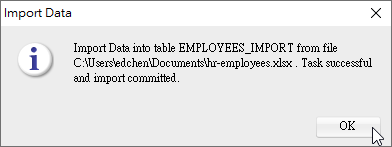
Import Data Confirmed
It shows "Task successful and import committed".
Refresh Table Data
To see new content, we click on Refresh icon.
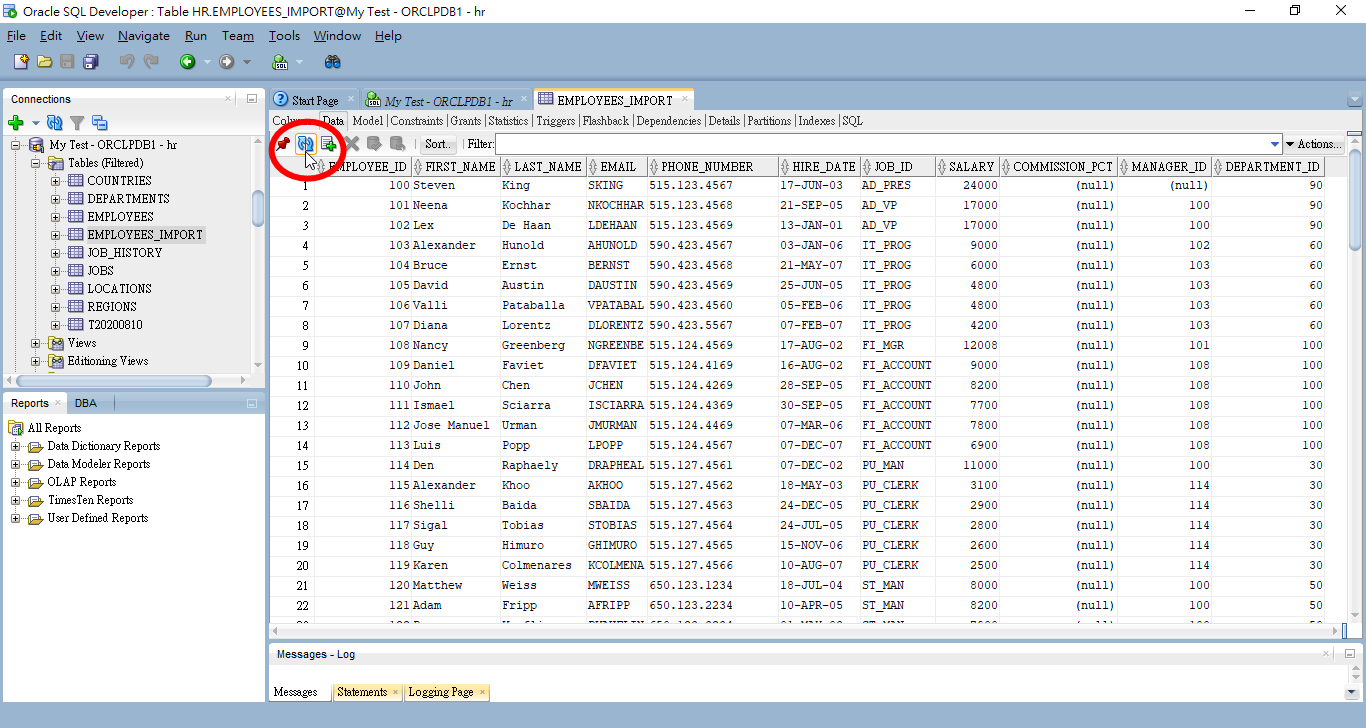
We did it.